Can You Clean an Oxygen Sensor? Cleaner Sprays, Methods & When to Replace
Yes, you can clean an oxygen sensor, but an oxygen sensor cleaner only helps when the sensor is coated in light, dry soot and its heater and wiring still work. It cannot repair age, a failed heater, or damage from oil, coolant or silicone. A replacement sensor costs about $20 to $300 in parts, and a shop job typically runs $200 to $500, so one careful cleaning attempt can make sense on a sensor that still responds. Below you will find which products are safe, the exact steps, what the fault codes mean, and when to replace the sensor instead.

James Mitchell
Senior Automotive Writer
12+ years writing clear, practical guides on vehicle maintenance and emissions systems.
What Is Oxygen Sensor Cleaner?
An oxygen sensor cleaner is a solvent product, sold as an aerosol spray or a fuel additive, meant to remove light carbon soot from an O2 sensor or limit new deposits. It does not repair a worn or electrically failed sensor. Only products whose label names oxygen sensors should touch the sensor tip.
How Oxygen Sensor Cleaner Is Supposed to Work
Before learning how to clean oxygen sensor hardware, it helps to know what the part does. An O2 sensor sits in the exhaust and measures how much unburned oxygen is left after combustion. It sends that reading to the engine computer, which uses it to adjust the air and fuel mixture. Most cars have an upstream sensor before the catalytic converter that guides fueling, and a downstream sensor after it that monitors converter efficiency. If you are not yet familiar with what a catalytic converter does, what a catalytic converter is and how it works covers that in full detail.
Soot becomes a problem when it clogs the vented metal shield around the sensing element and slows the sensor’s response. A direct spray cleaner is meant to dissolve that surface carbon after the sensor has been removed. A fuel additive works indirectly: it goes in the tank and aims to reduce combustion deposits that would otherwise reach the sensor. One major additive maker states that its product will not clean an already dirty sensor and can only help limit new carbon buildup, which is a fair way to set expectations for the whole category.
Can You Use Oxygen Sensor Cleaner Spray on an O2 Sensor?
Yes, but only when the can’s label explicitly permits direct use on oxygen sensors, and only after the sensor is removed and the exhaust is cold. A label that says O2 sensor safe often means the product will not poison a working sensor when used elsewhere, such as in a throttle body. Check the exact wording before you spray.
When the label does allow it, apply the oxygen sensor cleaner spray only to the sensing end, the slotted metal shield at the tip. Keep it off the connector, the wiring and the small vent near the wire entry, because the sensor draws reference air through that area and solvent or residue there can throw off its readings. Never spray solvent into a vacuum line, an intake opening or the exhaust as a shortcut to avoid removing the sensor.
Does Oxygen Sensor Cleaner Actually Work?
Sometimes, and usually only as a temporary fix. Cleaning can help when light, dry soot is slowing a sensor whose heater, wiring and ceramic element still work. It will not help a worn, cracked or chemically poisoned sensor, and a cleaner looking tip does not prove the sensor reads accurately again.
Most advice on how to clean oxygen sensor parts treats cleaning as routine, but sources disagree here, and the disagreement is real. Several parts retailers and repair publishers tell owners to replace a dirty sensor instead of reaching for an oxygen sensor cleaner, partly because the working element sits behind the shield where you cannot reach it, and partly because some warn that a cleaning attempt could complicate a warranty claim if the sensor is still covered. Other mechanics describe cleaning as an acceptable stopgap. One former mechanic reported wiping a 25 year old sensor with carburetor cleaner and getting through an inspection, but called the sensor well past its useful life.
The practical reading is this: if the rich condition that created the soot is fixed, normal exhaust heat can burn off some deposits, and a cleaning can help a sensor that was only coated. Treat an oxygen sensor cleaner as one controlled attempt, not a maintenance habit.
How to Clean an Oxygen Sensor Step by Step
- Scan for codes and let the exhaust cool completely.
- Disconnect the plug and remove the sensor with an O2 sensor socket.
- Inspect the tip for light soot or signs of contamination.
- Apply a cleaner approved for direct sensor use, then let it dry fully.
- Reinstall the sensor, rescan and check live data.
This method is for a sensor that still produces a signal. Most guides on how to clean oxygen sensor units skip the diagnosis stage, and that is where most wasted effort happens.
Tools and Supplies You Need
Gather these before you start so the job does not stall with the sensor half turned:
- An OBD2 scan tool that reads trouble codes and, ideally, live sensor data, so you can confirm the fault before and after cleaning.
- An O2 sensor socket or a suitable wrench, which usually costs $10 to $50, plus a ratchet and extension.
- Eye protection and chemical resistant gloves, because solvent sprays can irritate skin and eyes.
- An oxygen sensor cleaner whose label explicitly permits direct use on the sensor.
- Penetrating oil for stuck external threads, used only on a cold exhaust and kept away from the sensor tip and connector.
- A clean lint free rag, and a torque wrench set to the vehicle’s specification if you plan to reinstall the sensor.
- Vehicle specific service information so you can identify the correct bank and sensor position.
Locate and Remove the Oxygen Sensor
Start with a scan, because the code names the position. Bank 1 is the side of the engine that holds cylinder 1, and Bank 2 is the opposite side on V6 and V8 engines. Sensor 1 sits before the catalytic converter and Sensor 2 sits after it. Inline engines have one bank, so a Bank 1 Sensor 2 code on a four cylinder means the downstream sensor.
Removal is the hardest part of how to clean oxygen sensor parts, so wait until the exhaust is completely cold. Follow the sensor wire to its connector, release the clip without pulling on the wires, and free the harness from any holders so it does not twist. Seat the O2 sensor socket fully on the hex and turn with steady force. If the sensor will not move, apply penetrating oil to the cold external threads and wait. Stop if it still refuses, because a damaged threaded fitting in the exhaust costs more to fix than the sensor itself, and a stuck sensor is a good reason to hand the job to a shop.
Inspect the Sensor for Carbon and Contamination
Look at the tip before you apply anything. Light, dry black soot suggests a temporary rich mixture, and that is the only condition where cleaning is worth trying. A heavy, oily black coating points to engine oil consumption. White, red, green, glazed or grainy deposits point to coolant, silicone, fuel or additive contamination. A cracked, dented or melted sensor has physical damage.
If you see anything other than light soot, stop and replace the sensor after fixing the source. Also check the wire insulation and connector for burns, cuts or corrosion, since electrical damage is not something a cleaner can repair. Color alone never proves the diagnosis, so use the scan data too.
Clean the Sensor and Let It Dry
Follow the oxygen sensor cleaner’s label exactly and treat only the area it names, which is normally the sensing end. The core of how to clean oxygen sensor parts safely is restraint, so use the gentlest method the label allows. Do not push tools through the shield. Do not use a wire brush, sandpaper, compressed air, a flame or a heat gun. Old forum advice about heating the tip with a torch and quenching it in water can crack the ceramic element, so skip it.
Do not soak the sensor unless the product itself gives a soaking procedure, because there is no universal soak time. Let the sensor dry completely and keep the connector clean and dry before it goes back on the car.
Reinstall the Sensor and Check for Fault Codes
Check what the sensor maker says about thread treatment. Many new sensors arrive with antiseize already applied or packed in the box, and any compound belongs on the threads only, never near the tip. Thread the sensor in by hand first to avoid cross threading, tighten to the specified torque, route the harness away from the exhaust and moving parts, and reconnect the plug.
Then rescan for stored and pending codes. The full verification routine appears in the section on confirming the sensor works, because clearing a code alone proves nothing.
What Can You Use to Clean an Oxygen Sensor?
Use only an oxygen sensor cleaner spray whose manufacturer lists direct oxygen sensor cleaning, or an O2 sensor safe fuel additive for indirect treatment. Carburetor, brake and contact cleaners are not automatic substitutes, and gasoline, abrasives and flame should be avoided. The table below sorts the common options by what each is allowed to do.
| Product type | What it is meant for | Main limit |
|---|---|---|
| Dedicated oxygen sensor cleaner spray | Light soot, when the label states direct sensor use | Cannot repair age, electrical failure or chemical poisoning |
| O2 sensor safe fuel additive | Indirect treatment of combustion deposits at the labeled dose | Does not guarantee an installed sensor gets cleaned |
| Electronic contact cleaner | Connector areas, only when the label permits | Not automatically suitable for the sensing element |
| Carburetor or throttle body cleaner | The component named in its instructions | Not a default substitute for a sensor approved cleaner |
| Brake cleaner | Brake parts | Do not use on the sensor unless the maker approves it |
| Gasoline, WD40 or household solvents | Nothing related to sensors | Fire risk, residue and material compatibility problems |
Oxygen Sensor Cleaner Spray
A direct oxygen sensor cleaner spray is the more targeted option when the sensor has already been removed and the product expressly allows that use. A fuel additive is easier because the sensor stays in place, but it works indirectly through the fuel and combustion system and only within the scope of its label.
Neither an oxygen sensor cleaner spray nor an additive fixes an old sensing element, a failed heater, damaged wiring or a worn catalytic converter. When choosing between them, look for sensor specific instructions on the can. I did not verify any brand through testing, so judge a product by its label wording rather than by marketing claims.
Can You Use Carburetor or Brake Cleaner?
Only if the label specifically approves direct use on oxygen sensors. Many online guides say carburetor cleaner is fine, while others warn it can damage the sensor element, so the safe rule is to follow the product’s own instructions. If the label is silent about oxygen sensors, use a dedicated product instead.
A carburetor or throttle body cleaner that says O2 sensor safe usually describes use in its intended place, not soaking a sensor tip. Brake cleaner has no sensor approval at all in most cases. Electronic contact cleaner can suit connector areas when permitted, but it is not a stand in for sensor cleaner.
Why Household Cleaners and Abrasives Are Not Recommended
The sensing element is ceramic and fragile, so the wrong chemical or tool does more harm than the soot ever did. Gasoline brings fire risk and residue, and WD40 and household solvents leave films that were never meant to sit on a hot sensor. Acid, sandpaper and a wire brush can damage the housing or the element, and compressed air can push debris into places it should not go.
Chemistry matters beyond cleaning too. Silicone sealants and fuel additives that are not labeled oxygen sensor safe are known to poison the ceramic element, which is why label reading matters so much with anything that goes near the engine or fuel system.
When Should You Clean or Replace an Oxygen Sensor?
Clean only when testing points to light surface soot on a sensor that still responds. Replace it when the heater circuit has failed, the signal is slow or stuck, the housing or wiring is damaged, the sensor is old, or oil, coolant or silicone has contaminated it. When in doubt, replace, because removal labor is the same either way.
Signs of a Dirty or Contaminated O2 Sensor
The most common sign is a check engine light, often with an oxygen sensor or fuel trim code. Drivers also report worse fuel economy, a rough idle, misfires, a gasoline smell, dark exhaust smoke and a failed emissions test. Symptoms are usually stronger when the upstream sensor is the problem, because that sensor directly influences fueling, while a bad downstream sensor often shows up only as a light and catalyst monitor codes.
None of these symptoms prove the sensor is at fault. A rough idle can come from a vacuum leak, clogged injectors or a weak fuel pump, and the sensor may simply be reporting a lean condition honestly.
When Cleaning May Not Help
Cleaning cannot fix an open heater circuit, broken wiring, a sensing element that has aged out, or poisoning from oil ash, coolant, silicone or lead. High mileage sensors are poor candidates too, since age affects response speed in ways a solvent cannot reverse.
Picture a 2009 sedan with 140,000 miles that arrives with a P0133 slow response code and a check engine light that keeps returning. The owner has already sprayed the upstream sensor twice, and each time the light disappeared for about a week. On a scan tool the sensor switches lazily and fuel trims run rich. A closer look shows an oily residue on the tip, and the engine is burning oil. A technician would fix the oil source first and then replace the sensor, because no cleaner removes oil ash from the element. This is an illustrative scenario, not a real customer case.
How to Tell If the Oxygen Sensor Has Failed
A scan tool is the reliable test. Look for a stuck or slow sensor signal, heater circuit codes such as P0135 or P0141, and fuel trims that stay far from normal. Many oxygen sensor codes come from vacuum leaks, exhaust leaks or fuel problems, so a code alone does not prove the sensor is bad.
A sensor can also be bad without setting any code. More often it simply becomes slow with age or contamination, and a technician may need an oscilloscope to see that. Before buying a part, check for exhaust leaks near the sensor, damaged wiring and any fluid leak that could contaminate it. If fluid contamination caused the failure and the source is not fixed, the new sensor can be ruined too.
Can Cleaning an Oxygen Sensor Fix the Check Engine Light?
Only if the light was set by a sensor slowed by light soot. Cleaning cannot fix a failed heater circuit, damaged wiring, a worn catalytic converter or a vacuum leak, and the light returns when the real cause remains. Always read the code and confirm with live data before and after cleaning.
Oxygen Sensor Fault Codes and What They Mean
Codes that name an oxygen sensor are the first step in a diagnosis, not the final answer. This table lists the common Bank 1 codes and whether cleaning has any realistic chance of helping.
| Code | What it means | Can cleaning help? |
|---|---|---|
| P0130 | Bank 1 Sensor 1 circuit malfunction | Rarely, test the wiring and connector first |
| P0131 | Bank 1 Sensor 1 low voltage, a stuck lean signal | Possibly, only if light soot is the confirmed cause |
| P0132 | Bank 1 Sensor 1 high voltage, a stuck rich signal | Possibly, but find the cause of the rich condition first |
| P0133 | Bank 1 Sensor 1 slow response | Sometimes, if light soot is slowing it and live data confirms it |
| P0135 | Bank 1 Sensor 1 heater circuit fault | No, cleaning cannot repair an open or shorted heater |
| P0141 | Bank 1 Sensor 2 heater circuit fault | No, test the heater circuit, power and ground |
| P0171 | Bank 1 system too lean | Not directly, check for vacuum leaks, airflow and fuel pressure |
| P0172 | Bank 1 system too rich | Not directly, check injectors and fuel pressure |
| P0420 | Bank 1 catalyst efficiency below threshold | No, diagnose the converter, exhaust leaks and mixture |
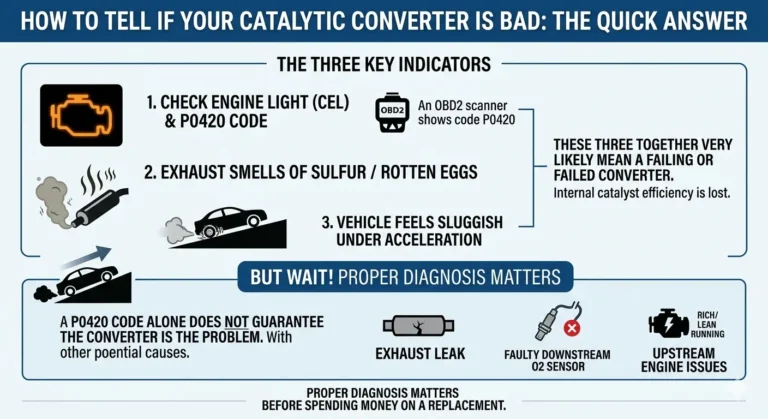
Bank 2 versions of these codes sit in the P0150 range, for example P0151 and P0155. A P0420 code usually points to the converter rather than a dirty sensor, and how to tell if a catalytic converter is bad explains that diagnosis.
Why the Check Engine Light May Return After Cleaning
The light returns when the cause of the soot is still present, and an oxygen sensor cleaner cannot remove that cause. A rich mixture, oil consumption, a coolant leak or contamination from a silicone sealant will recoat or poison a cleaned sensor. A cleaning also does nothing for an aged element, so the sensor may stay slow even when it looks clean.
Clearing the code with a scan tool simply resets the monitor. It does not prove the fault is gone, and the check engine light comes back once the monitor runs again and finds the same problem. Emissions testing rules differ by state, so check your local requirements before assuming a cleared code will pass an inspection.
How to Confirm the Sensor Is Working Properly
Do not judge success by a cleaner looking metal cap or a light that stays off for a day. Use this routine instead:
- Confirm the sensor and exhaust are reinstalled without a leak and the harness is secure.
- Warm the engine normally and review the sensor’s live data on the scan tool for a signal that moves instead of sitting fixed.
- Check the related fuel trims for values that are closer to normal than before.
- Complete a normal drive cycle so the affected monitor has a chance to run.
- Rescan for stored and pending codes and watch for the original symptoms returning.
Cleaning has failed if the signal stays fixed, biased or slow, the heater test still fails, the same code returns, or the engine still has the condition that contaminated the sensor. Another solvent or a longer soak is unlikely to be the right next step at that point.
Oxygen Sensor Cleaning vs. Replacement
Cleaning costs little beyond a can of oxygen sensor cleaner and an O2 sensor socket, but it only suits a sensor that still responds and usually buys limited time. Replacement costs about $20 to $300 in parts, or $200 to $500 at a shop, and removes the guesswork. Because the sensor has to come out either way, cleaning mainly saves the price of the part.
Cleaning Costs Compared With a New Sensor
These United States figures come from parts retailers and repair estimators, with the repair estimates last updated July 25, 2026, and your price will vary by vehicle and region.
| Cost item | Typical cost | What drives the price |
|---|---|---|
| O2 sensor socket or wrench | $10 to $50 | Tool quality and set size |
| DIY replacement sensor, parts only | $20 to $300 per sensor | Vehicle, sensor type and brand |
| Bosch narrowband sensor at a parts store | Under $40 for some models | Sensor design and fit |
| OEM style heated sensor for some GM vehicles | Around $150 | Genuine parts markup |
| Professional replacement, parts and labor | $200 to $500 | Shop labor rate and sensor access |
| Chevrolet Silverado 2500 shop estimate | $302 to $398 | Parts $253 to $327, labor $49 to $72 |
| 2019 BMW 640i xDrive Gran Coupe shop estimate | $736 to $956 | Parts $406 to $473, labor $329 to $483 |
| 2024 Audi RS6 Avant shop estimate | $1,539 to $1,568 | Parts around $1,478 |
Luxury and performance models cost more because the sensors are pricier and sometimes harder to reach. Dealerships typically stock OEM parts at a markup, while an independent shop using aftermarket parts can lower the bill. I could not verify a current price for oxygen sensor cleaner cans, so check retail pricing before you buy one.
How Long a Cleaned Oxygen Sensor May Last
No manufacturer or repair source gives a reliable mileage for a cleaned sensor, so treat any cleaning as temporary. Cleaning does not reset the age of the sensing element, and a sensor that was already slow from wear will usually stay that way.
For new sensors, typical life depends on design. Unheated one wire and two wire sensors are generally rated at 30,000 to 50,000 miles, heated sensors at 60,000 to 100,000 miles, and newer wideband sensors can run past 100,000 miles. Some automakers publish their own schedules: Jaguar lists 90,000 miles, and Jeep lists 72,000 miles or 72 months for 1987 to 2017 Wrangler models. Driving conditions, fuel quality and engine health move these numbers either way.
When Replacing the Sensor Is the Better Option
Replace the sensor when testing confirms a failed heater, an open or shorted internal circuit, a slow or inaccurate response, physical damage, age related wear or permanent contamination. Replace it too when one careful cleaning does not change the verified fault, or when the risk of damaging a stuck fitting outweighs the chance of saving the old unit.
You usually do not need to replace every sensor because one failed. Upstream sensors often wear out first because they see more heat, so replacing only the confirmed bad one is reasonable, though replacing several old sensors together makes sense on a high mileage car. Confirm the bank and sensor position, connector shape and wire length before ordering, and fix any oil or coolant leak first. A driveway swap typically takes about an hour.
Do not leave a failed sensor in place for long. You can usually drive a short distance, but a sensor that pushes the mixture too rich can send excess fuel into the catalytic converter and shorten its life.
James Mitchell
Senior Automotive Writer
12+ years writing clear, practical guides on vehicle maintenance and emissions systems.
Frequently Asked Questions
Conclusion:
An oxygen sensor cleaner is worth one careful attempt only when a scan tool shows a sensor that still responds and the tip carries light, dry soot. Fix the cause of the soot first, use a product approved for direct sensor use, and verify the result with live data and a full drive cycle. If the code returns or the sensor shows damage or age, buy the correct replacement for your bank and position.